Sunday, April 30, 2017

Masking Identity - 3-D Materials and Concepts

In Process Photos

In Process Side View; Tracing Paper, Wire, Masking Tape, Gel Medium; Approx. 1' x 1.5' x 2'

In Process Top View; Tracing Paper, Wire, Masking Tape, Gel Medium; Approx. 1' x 1.5' x 2'

In Process Detail; Tracing Paper, Wire, Masking Tape, Gel Medium; Approx. 1' x 1.5' x 2'

Sketches and Designs

Final Solution for front, initial ideas of question mark shapes for back of mask

Ideas and small drawing of front corner design

Zoomed in on small drawing of corner feature of mask

Final Solution Photos

Masking Identity Front View; Wire, Tracing Paper, Gel Medium, Masking Tape, Ink; Approx. 1' x 1.5' x 2'
Masking Identity Side Quarter View; Wire, Tracing Paper, Gel Medium, Masking Tape, Ink; Approx. 1' x 1.5' x 2'


Inspiration

Craig Green

Clarina Bezzola
Silvia Heger


http://foundations3ddesign.blogspot.com/


Artist Statement

     With this project, I wanted to explore the concept of the unknown - more specifically, the fear of the unknown. The mask is meant to capture the image of wondering what waits, or lurks, just around the corner. Within the corner is fairly simple and clean, but the back of the mask contains several pyramid-like forms to visualize any worries a person may have in the back of their mind - hence the reason why the shapes are on the back of the mask. These worries are bleeding and creeping towards our focus, but they are merely ideas for the moment as the reality in the front of the mask is free of these worries currently. The ominous nature of the concept and the somewhat creepy idea of the odd and abstract mask is embraced with the form of the mask. The mask is very organic and appears warped and unstable. A corner is usually found in a structure, so the mask is made to resemble a rickety and musty building/house. The masking tape in certain areas comes across as tangled balls of cobwebs, while the wire showing through the paper resembles the frame and structure of the house. The in process pictures probably do the best in showcasing these elements. The texture of how the paper is applied also furthers this visual effect. The colors were chosen because both blue and black are associated with dreary or sullen feelings.

     In the photographs, the renaissance symbol is the eye representing vision. Vision in these photographs refers to the lack of vision that strikes fear in a person when questioning what will occur in both the near and distant future. The particular image used in the photographs is the symbol found on U.S. Dollar Bill and also often identifying the Illuminati and Free-Masons. I chose this form of the eye because the organizations it represents are primarily known for their mysterious nature and behavior, another example of the unknown. The symbol, referred to as the "eye of providence," is symbolic of an all-seeing eye. (The symbol has light coming from it in first photo because original symbol has light rays projecting from it.) This ties in to the concept of the mask since a lot of worries are produced from worrying about the perception others have of you. A few other more minor symbols or images found in the images are corners (focus of mask's face), mirrors (pondering and self-reflecting is key to idea of overarching project - identity), Tomorrowland (future and unknown), and moons in the background (moons and space usually associated with the future or unknown frontier).

Memento - 3-D Materials and Concepts

Memento Front Quarter View; Glass, Screen and Wood; 1.5" x 4.5" x 1.25"

In Process Photos

In Process; Glass, Screen and Wood; 1.5" x 4.5" x 1.25"
In Process Materials; Glass, Screen and Wood; 1.5" x 4.5" x 1.25"


Sketches and Designs


Ideas for Memento that closely preceded final solution

Initial ideas for Memento with alternate materials and even concepts

Various Angles and Detail Photos

Memento Corner Detail; Glass, Screen and Wood; 1.5" x 4.5" x 1.25"

Memento On Side Detail; Glass, Screen and Wood; 1.5" x 4.5" x 1.25"


Memento Quarter View; Glass, Screen and Wood; 1.5" x 4.5" x 1.25"

Memento Side View: Glass, Screen and Wood; 1.5" x 4.5" x 1.25"

Memento Front Quarter View; Glass, Screen and Wood; 1.5" x 4.5" x 1.25"

Memento Quarter Side View; Glass, Screen and Wood; 1.5" x 4.5" x 1.25"

Inspiration

Marco Tirelli

Julia Harrison

Mel Kendrick


http://foundations3ddesign.blogspot.com/search/label/Memento%20Artists?updated-max=2016-09-17T17:19:00-04:00&max-results=20&start=12&by-date=false

Artist Statements

    The memory this memento is based off of is one of sitting in the living room of my grandparents' house in Eastern Kentucky. I look through the sliding glass door into their backyard full of life and nature. A rocking chair my Granddaddy sits in is to the right of me, pointing outside as well. I chose the three materials to convey the wooden rocking chair and the glass and wire screen of the sliding glass door - the focus of the memory. The screen is purposely worn and imperfect to closely resemble the nature and quality of the screen in the sliding glass door. The wood is meant to symbolize the rocking chair, even to the point that the memento can rock back and forth. I also was careful to ensure that a sense of depth existed in the memento, which is present in the space created underneath the glass/screen and above the wooden curve. This space captures the openness of the backyard that captured my gaze through the glass. Finally, I also attempted to make the memento very tactile and interactive to reinforce the strong relation between the viewer/holder and the small object.

Saturday, April 29, 2017

3-D to 2-D - 3-D Materials and Concepts

"Moonage Daydream"

Window Frame Version
Easel and Paper Version

Artist Statement

     I made this image to appear like a collage, to show that the individual images and items are pieced together into a single cohesive image. However, the images are distorted and taken out of context enough to where a viewer that has seen the original images will not be distracted or even be able to recognize many of the images. When I thought of 2-D images, I immediately envisioned the style of animation or cartoons. So, I made the image very fantastic and bright to separate the image from the reality of the original images. This was also the reason for making the focus of the image a smiling character walking through the landscape. The framing around the image play two different roles depending on the version. The first image has the framing for a window into this fictional land; the second image uses shading to create the illusion of this image existing in a 3-D world within the image as a whole (kind of like a paper is on an easel). Finally, the title (also the title of a David Bowie song) reflects the outer space setting of the image, first of all, but also the dream-like and fantastical quality to the image. 


Sunday, April 23, 2017

Map Relief - 3-D Materials and Concepts

Map Relief Front View; Foam Board, Black and White Ink, Paper, Glue; Approx. 2' x 2' x 3"

In Process Photo

In Process; Foam Board, White Ink, Black Ink, Glue; Approx. 2' x 2' x 3"

Sketches and Designs

Various Angles and Detail Photos

Map Relief Front View; Foam Board, Black and White Ink, Paper, Glue; Approx. 2' x 2' x 3"

Map Relief Right Quarter View; Foam Board, Black and White Ink, Paper, Glue; Approx. 2' x 2' x 3"
Map Relief Left Quarter View; Foam Board, Black and White Ink, Paper, Glue; Approx. 2' x 2' x 3"


Map Relief Center Detail; Foam Board, Black and White Ink, Paper, Glue; Approx. 2' x 2' x 3"

Map Relief Detail; Foam Board, Black and White Ink, Paper, Glue; Approx. 2' x 2' x 3"

Artist Statement

     I chose to map the conflict between order and chaos and how there cannot be one without the other. My idea began when I drew a map showing the conflict between man-made and natural objects. I liked the idea, however I wanted the final concept to be more general and less representational. Therefore, I chose to simplify the two conflicting forces to chaos (nature) and order (man-made). With the color, I originally wanted to convey the message of man-made objects covering or consuming nature - the original drawing shows a conventional map of nature with man-made materials added later on top of the existing landscape. The black (man-made) would overlap and cover the white and pure nature. As my concept progressed, I envisioned a circle with order and geometric designs fading gradually into a state of chaos. In the final product this would end up being a chaotic center gradually becoming more ordered to the outer boundary. The representation of order is on the outside of the circle because order always attempts to disguise or hide chaos - this goes back to my first idea of order of human objects replacing the chaotic essence of nature.


     In the final solution, I represent the idea of order with the geometric and more graphic edge of the circle. These shapes and figures are very much controllable and are also clean and neat in color. The center represents a raw chaos that is hard to control - thus I chose to use ink splatters to convey this chaos because the ink is sporadic and random. I did purposefully mimic some of the ink designs after outer space designs, as space often appears chaotic and random. Also, the designs continue the loose and gestural visuals that convey chaos. The torn paper also displays the wild nature of chaos and also the opposite of order and neatness. The squares and triangles serve as a bridge between the two conflicting forces and show how often in life there is not just one or the other. There must be order to know what chaos is truly. The shapes are very organized but the color is wild and crazy - outside the borders. Besides aiding the concept, the shapes also move the viewer's eye to the center of the piece. Finally, the construction method I chose for this piece was "egg crating" with the semi-circles on the edge fitting into grooves made into the primary circle's edge.


Inspiration

Aaron S. Moran
Eduardo Chillida


Marceau Avogadro

Images Source: http://foundations3ddesign.blogspot.com

Wednesday, April 19, 2017

Balsa Wood Small Sculptures - 3-D Materials and Concepts

In Process Photos

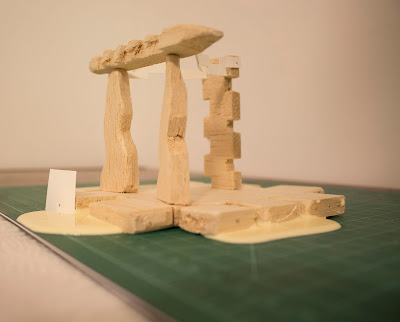
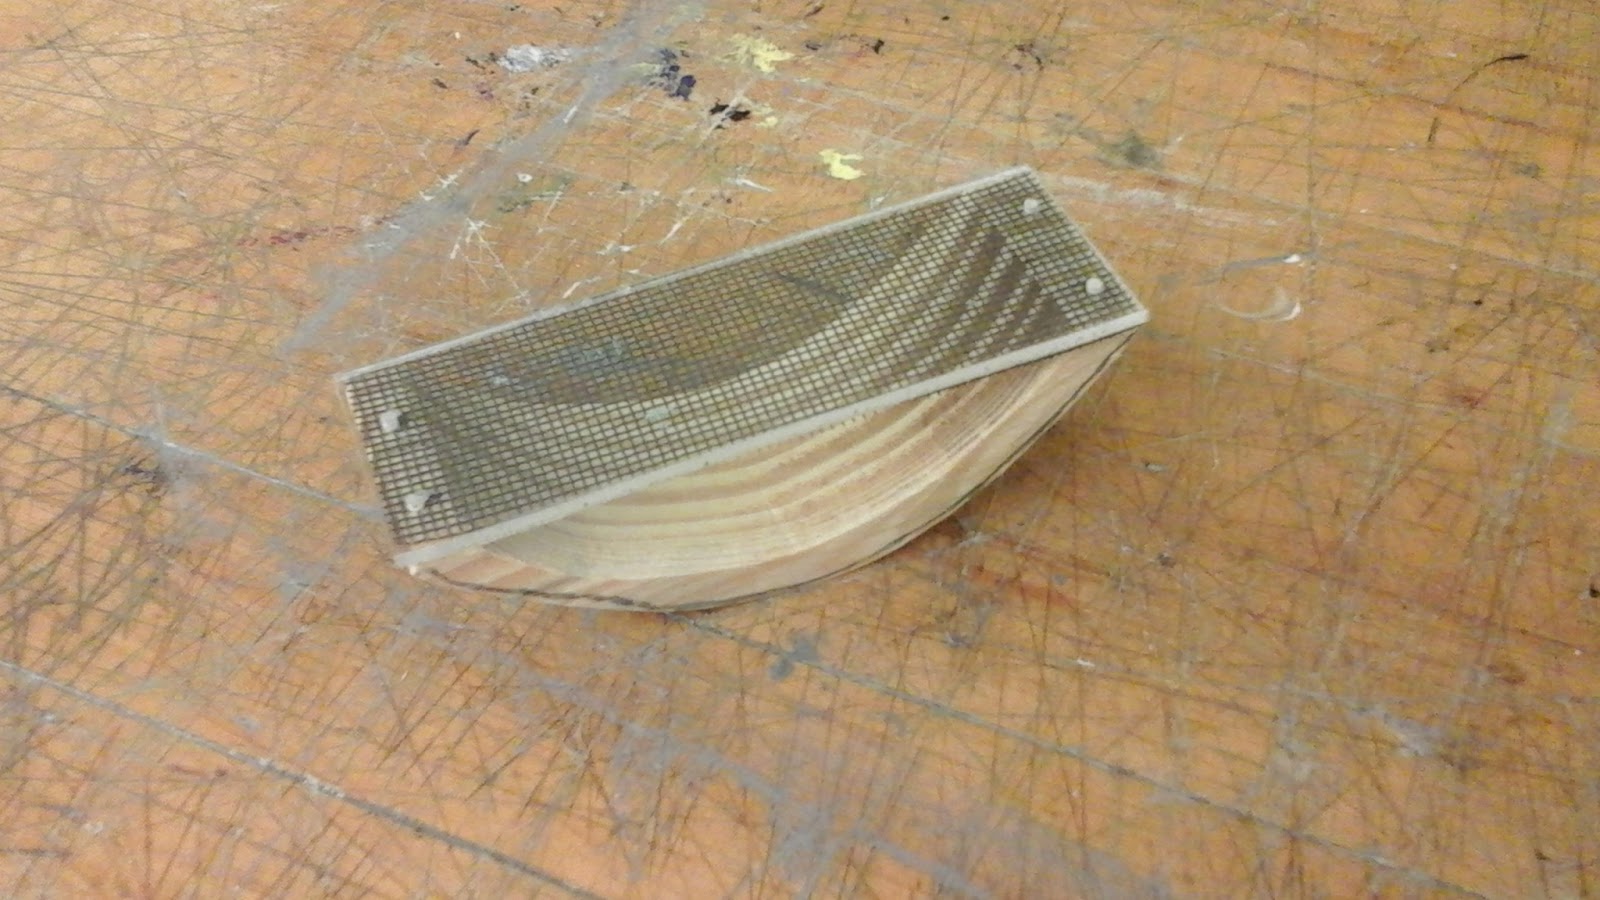
Drying Glue In Process; Balsa Wood, Wood Glue, Paper, Masking Tape, Pins; 6.5" x 5" x 8.5"
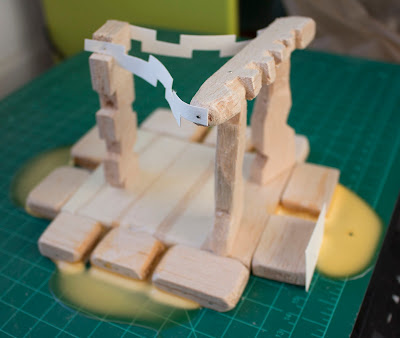
Dried Glue In Process; Balsa Wood, Wood Glue, Paper, Masking Tape, Pins; 6.5" x 5" x 8.5"


Various Angles and Detail Photos

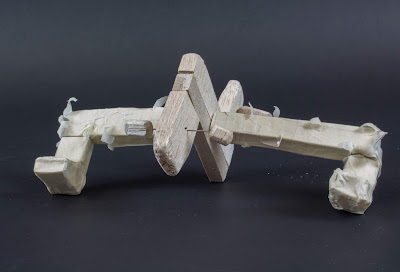
Symmetry Front Quarter View; Masking Tape, Balsa Wood, Pins; 8" x 3.5" x 5.5"

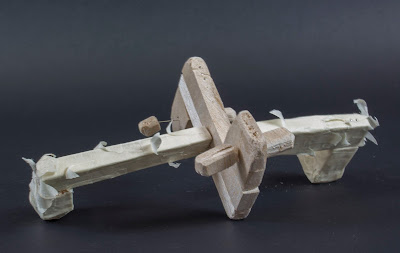
Symmetry Back Quarter View; Masking Tape, Balsa Wood, Pins; 8" x 3.5" x 5.5"

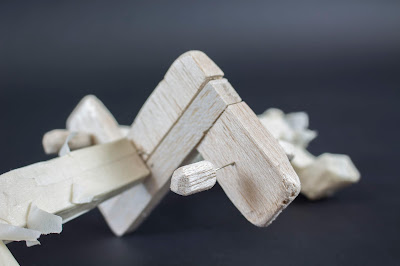
Symmetry Detail; Masking Tape, Balsa Wood, Pins; 8" x 3.5" x 5.5"

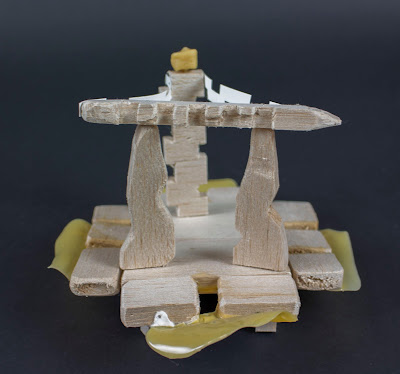
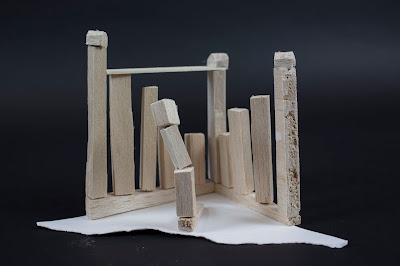
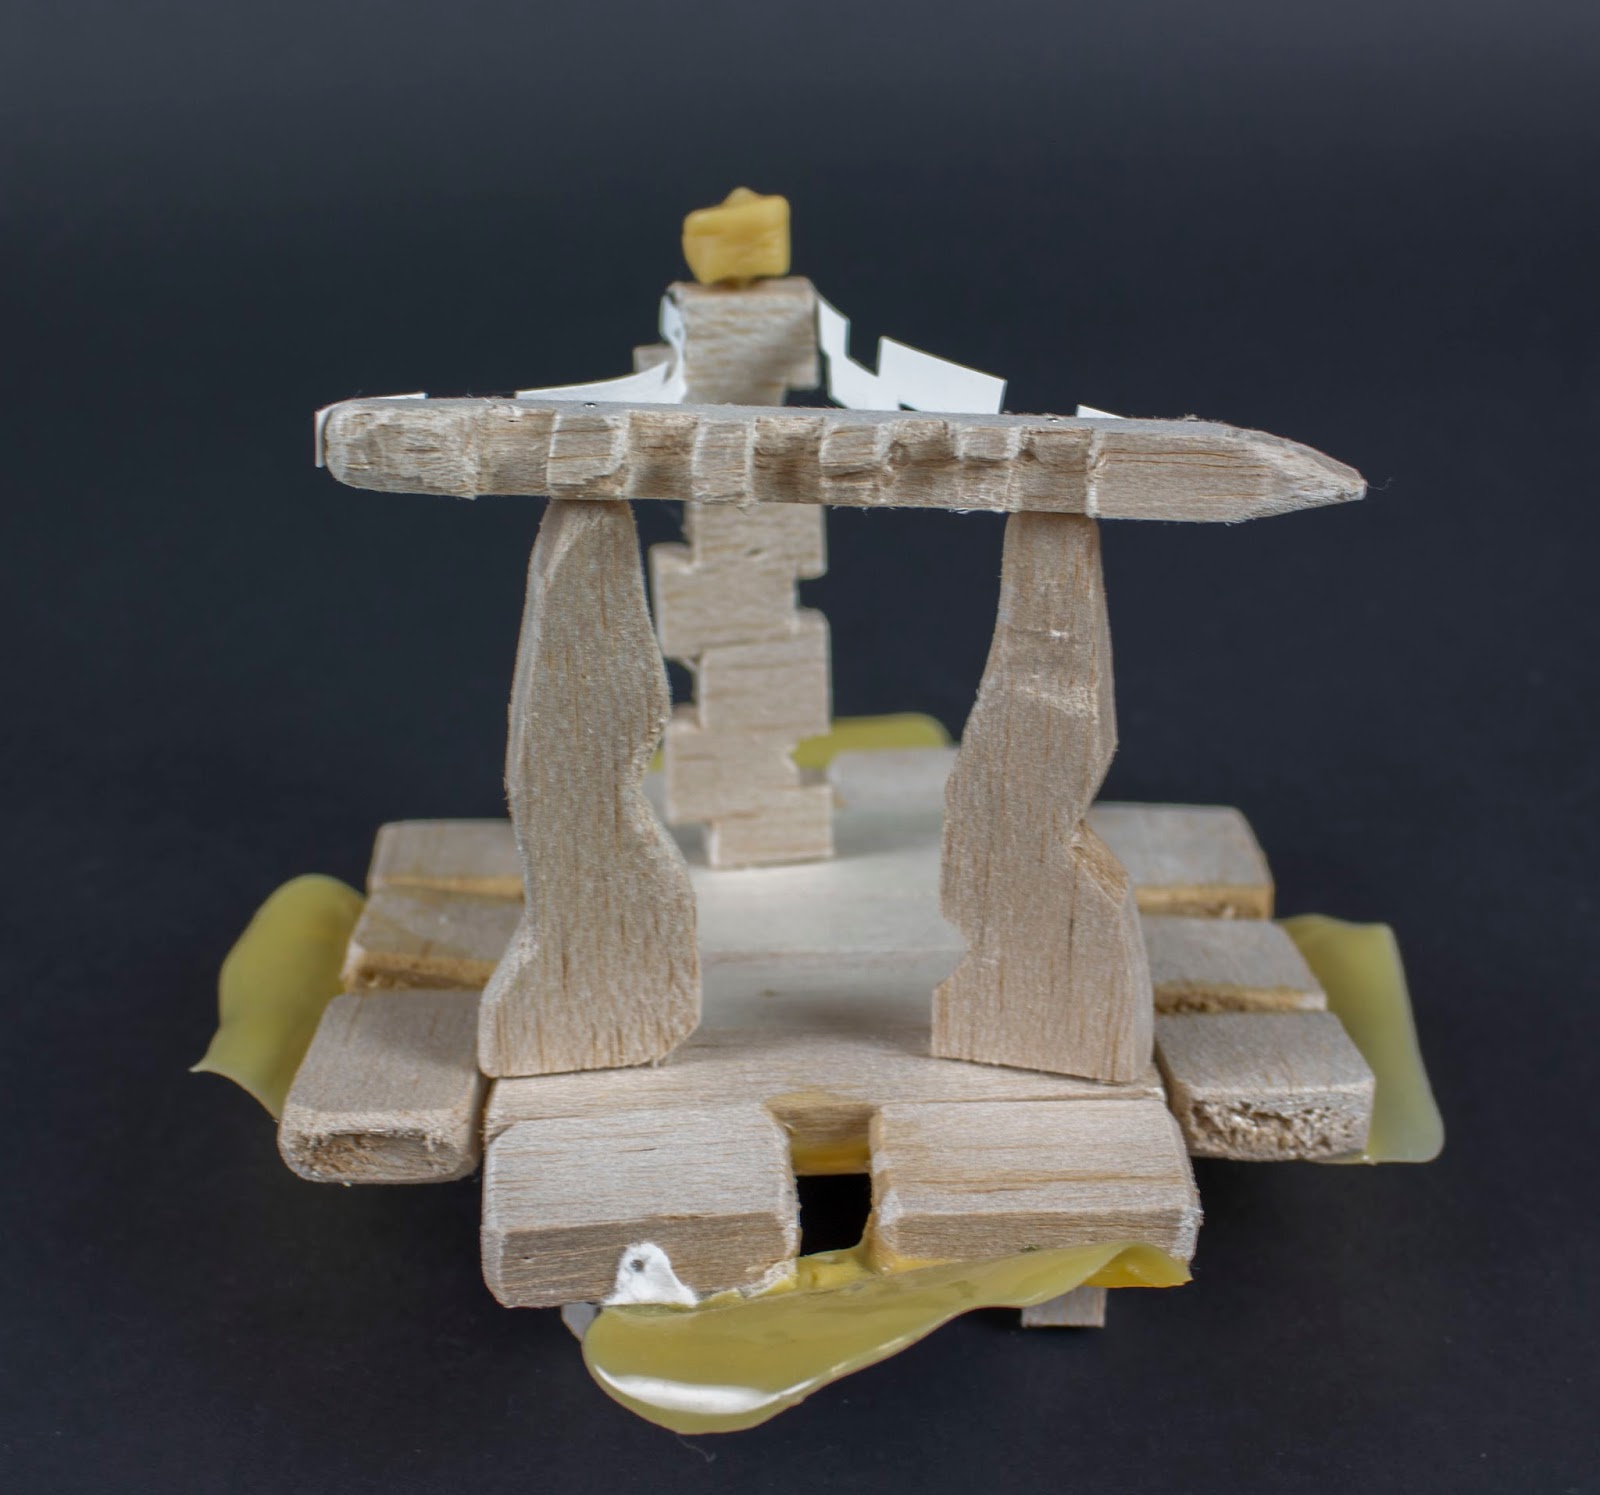
Pattern Front View; Balsa Wood, Masking Tape, Wood Glue, Pins; 6.5" x 5" x 8.5"

Pattern Side View; Balsa Wood, Masking Tape, Wood Glue, Pins; 6.5" x 5" x 8.5"

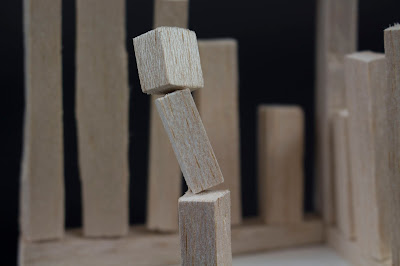
Pattern Detail; Balsa Wood, Masking Tape, Wood Glue, Pins; 6.5" x 5" x 8.5"

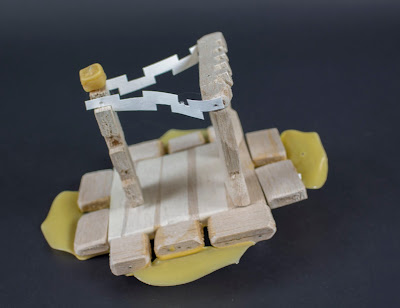
Scale Front View; Balsa Wood, Paper, Pins; 7.5" x 5" x 4"

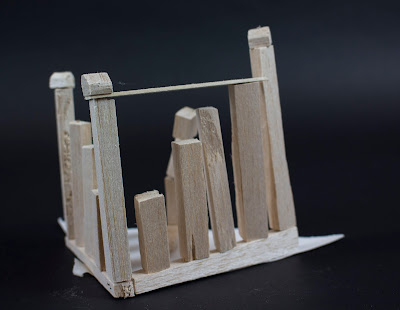
Scale Back Quarter View; Balsa Wood, Paper, Pins; 7.5" x 5" x 4"

Scale Detail; Balsa Wood, Paper, Pins; 7.5" x 5" x 4"

Artist Statements

Sculpture #1 - Symmetry

      This first sculpture transitioned from being texture originally to symmetry. That is the reason for the very particular texture of the tape on the "wings" of the figure. However, this aspect of the figure worked for the new concept since it gave the object another detail to be reflected on the other side. The wing went from being a worm-like object to being duplicated into reflective "wings." Just as was the case with the other two sculptures, I wanted to be very free and loose with the materials/idea and tweak and add to the figure as I continued the process. Overall, I wanted a process that would not be limited by its beginning and could shift and adapt as I add pieces to the sculpture. In hindsight, I wish I had created a more firm foundation to work off, but I did find it interesting to mold and change my original creation as I progressed.

Sculpture #2 - Pattern

     Repetition could also probably work for this figure, but the fact that the front of the sculpture does not repeat the square pattern of the rest would exclude this option. This one, especially, is where a sense of architecture is conveyed in the final product. For the arch, even though I was not explicitly trying to mimic it, I was very likely inspired by the Japanese torii - which explains the curvy design of the arch as a whole. The glue that appears as a floating puddle was originally intended to be a sort of tile grout but ended up as a more abstract and flowing pattern that extended the boundaries of the otherwise squarish figure. Although in a more unintentional way, this is once again an example of the free and fluid process of building these sculptures that I wanted from the beginning.

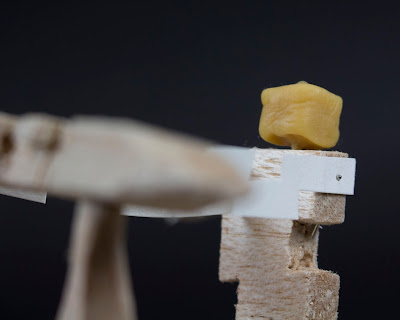
Sculpture #3 - Scale

   With the final sculpture, I wanted to communicate a sense of comparison in scale. Thus, I created a single, abstract object to compare to the rest of the "tower" figures. I also placed a edge on the top of the left side of the figure to mimic the look of bar graphs - the comparing of the scales of various bars in order to illustrate a statistic. It also creates a difference between the two sides of the sculpture, pushing the viewer to make further comparisons within the piece. However, I did not want this sculpture to be too straight and perfect. The added differences between the several bars allows for another aspect to compare and also nicely contrasts the idea of neatness and straightness that accompanies scales and bar graphs. Besides being aesthetically pleasing (especially when shadows cast upon it) the white paper torn on the bottom continues to juxtapose the clean-cut lines and worn edges that both exist on this paper while also creating a nice sense of space within the art piece.


Saturday, April 15, 2017

Soap Carving Tiger - 3-D Materials and Concepts

In Process Photos

In Process Comparison; Soap Bar; 4" x 2.5" x 1.5"
In Process Top View; Soap Bar; 4" x 2.5" x 1.5"


Comparison, Various Angles and Detail Photos

Soap Tiger Side View 1; Soap Bar and Straight Pin; 4" x 2.5" x 1.5"

Soap Tiger Front View 1; Soap Bar and Straight Pin; 4" x 2.5" x 1.5"

Soap Tiger Side View 2; Soap Bar; 4" x 2.5" x 1.5"

Soap Tiger Quarter Detail; Soap Bar; 4" x 2.5" x 1.5"

Soap Tiger Left Quarter Detail; Soap Bar; 4" x 2.5" x 1.5"

Soap Tiger Rear View; Soap Bar; 4" x 2.5" x 1.5"

Soap Tiger Right Side View; Soap Bar; 4" x 2.5" x 1.5"

Soap Tiger Left Side View; Soap Bar; 4" x 2.5" x 1.5"